 Lighting
How to enable Modbus
Warning! DEFA Power has to be installed by a certified electrician. This guide is intended for installers only.
The DEFA Power Setup app is the tool that installers use to complete a DEFA Power installation. The app is available in App Store (iOS) and Google Play (Android) and it is free to download. Look for this icon:
Download the app to get started:
Download the app and register your installer information to get started.
Look for this icon:
How to enable Modbus
1
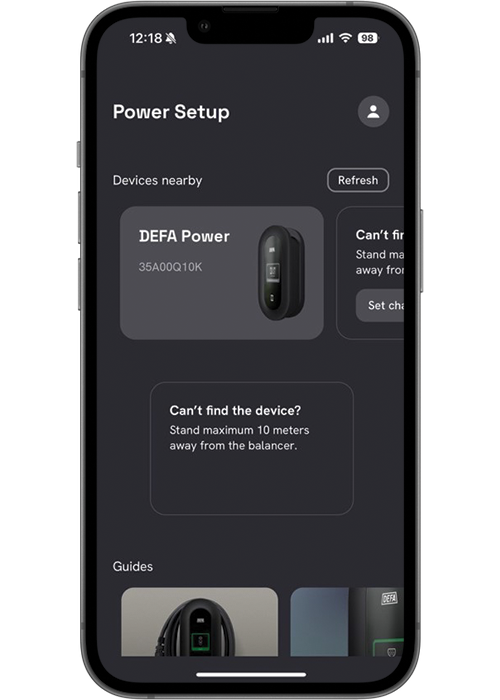
Connect to the charger
Use the DEFA Power setup app and connect to the DEFA Power unit you are about to setup
Note! To enable Modbus, the charging station requires firmware 4.1.1 or newer.
2
Connect the charger to a network
Set the charging station to the same network as the modbus device

3
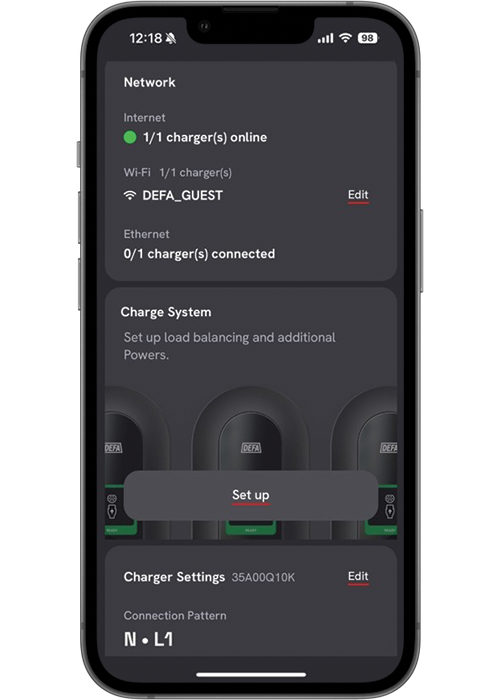
Setup charger system
Select the “Set up” Charge system at the dashboard when connected to the charging station
4
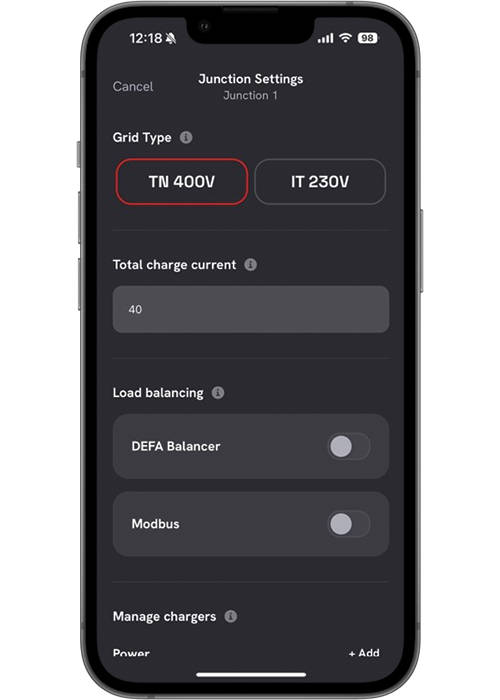
Junction settings
In the junction settings, scroll down to “Load balancing”.
5
Enable Modbus
Enable the Modbus feature by using the toggle. Select edit to change Modbus settings.
Note!
Only one load balancing unit can be used at a time
6
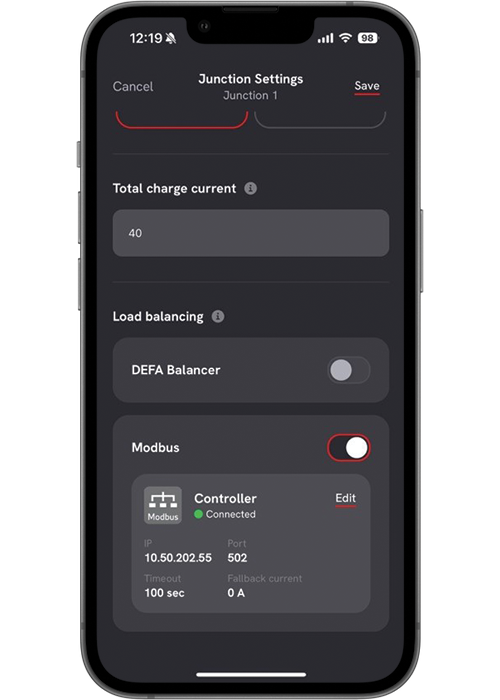
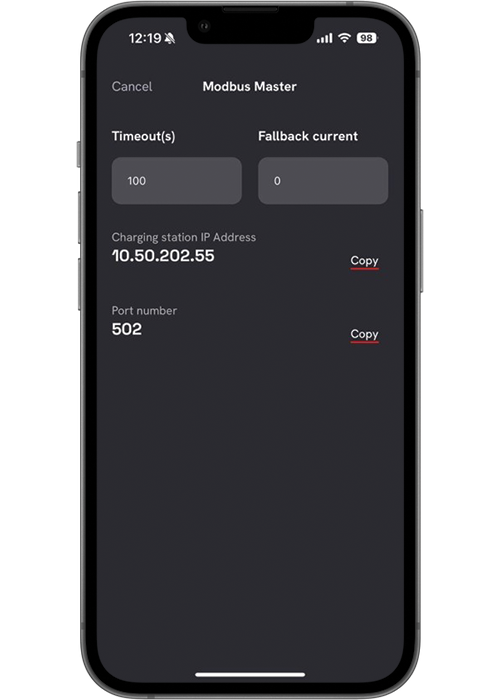
Modbus settings
Select timeout value and fallback current in case the charging station loses connection to the Modbus device
7
Save settings
Save the junction settings by clicking the “Save” button in top right corner.
The Modbus settings are now Saved.
You will now be guided back to the dashboard and the rest of your setup can be completed.

Published: October 8th, 2024


