
 No idle charging and heating system
 Professional Chargers
 EV charging solutions
DEFA Power installation with NEMA plug
Four easy steps to mount DEFA Power using a NEMA 14-50 Socket
Congratulation on your DEFA Power.
If you prefer to mount your DEFA Power using a NEMA 14-50 socket, you can follow the instructions below.
If you prefer a hard wired installation, you need to contact a certified installer. Read more here
Follow the instructions in the installer manual or in this video:
You can also check the easy step-by-step guide below👇
1
Prepare for installation
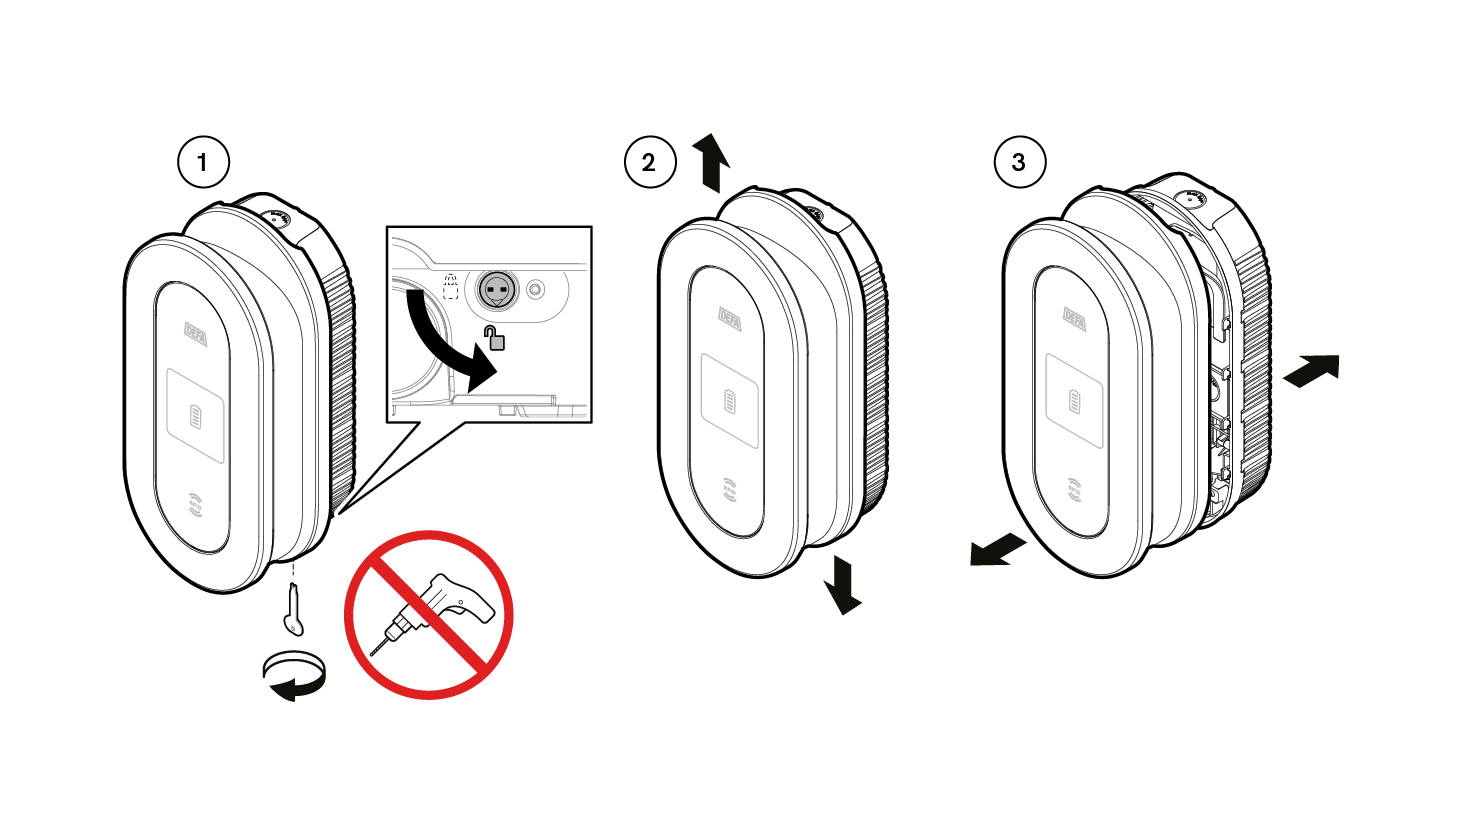
Make sure that the locking level is in open position (1). Then separate the Wall bracket from the Charging Unit by sliding the two in opposite direction (2), and then pull them apart (3).
2
Position and mount the Wall bracket and the docking.
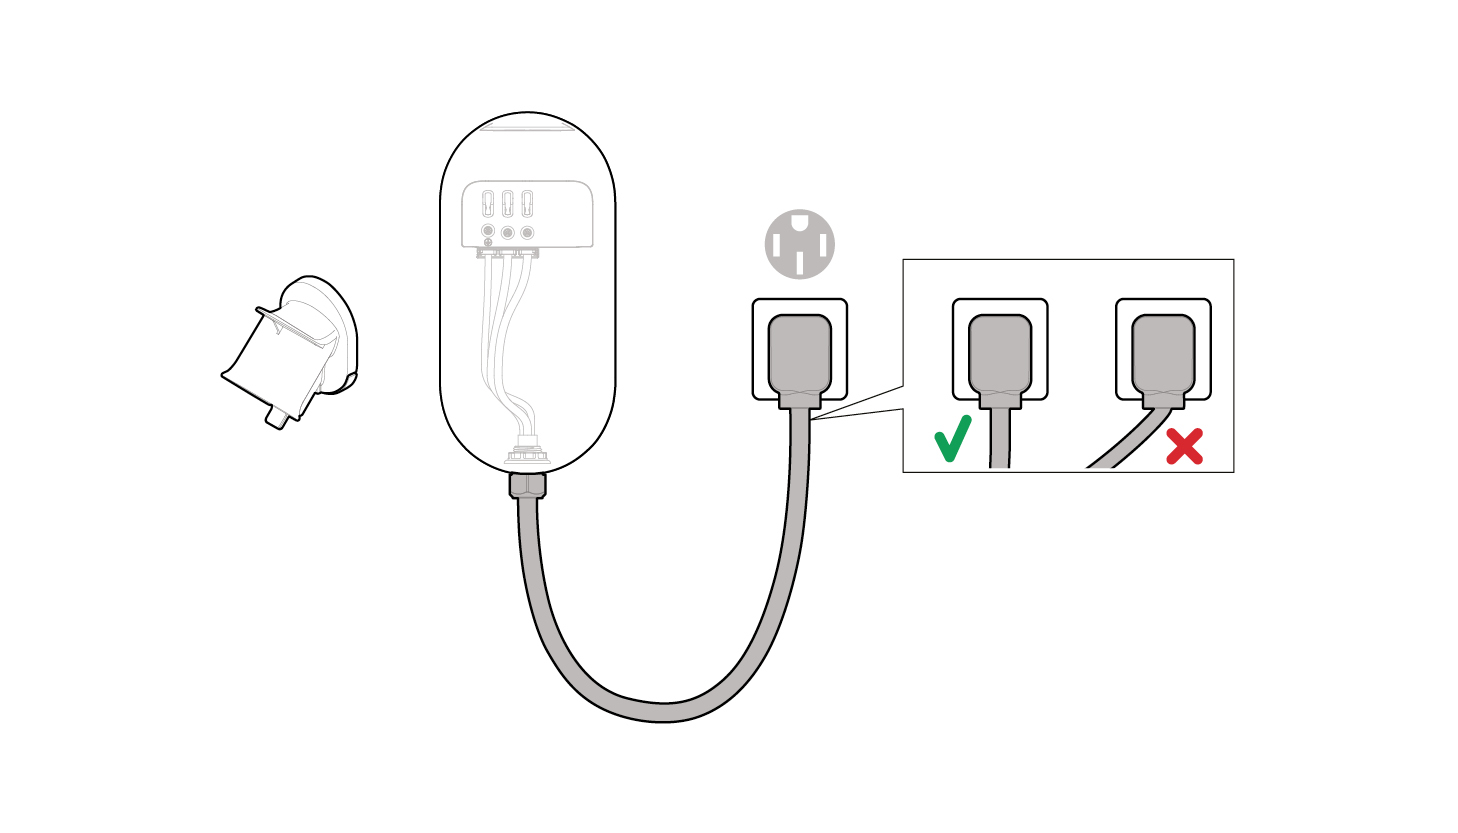
Turn off the power. Find a suitable location, considering minimum height from the ground, and maximum distance from the NEMA 14-50 socket.
3
Install the Charging Unit
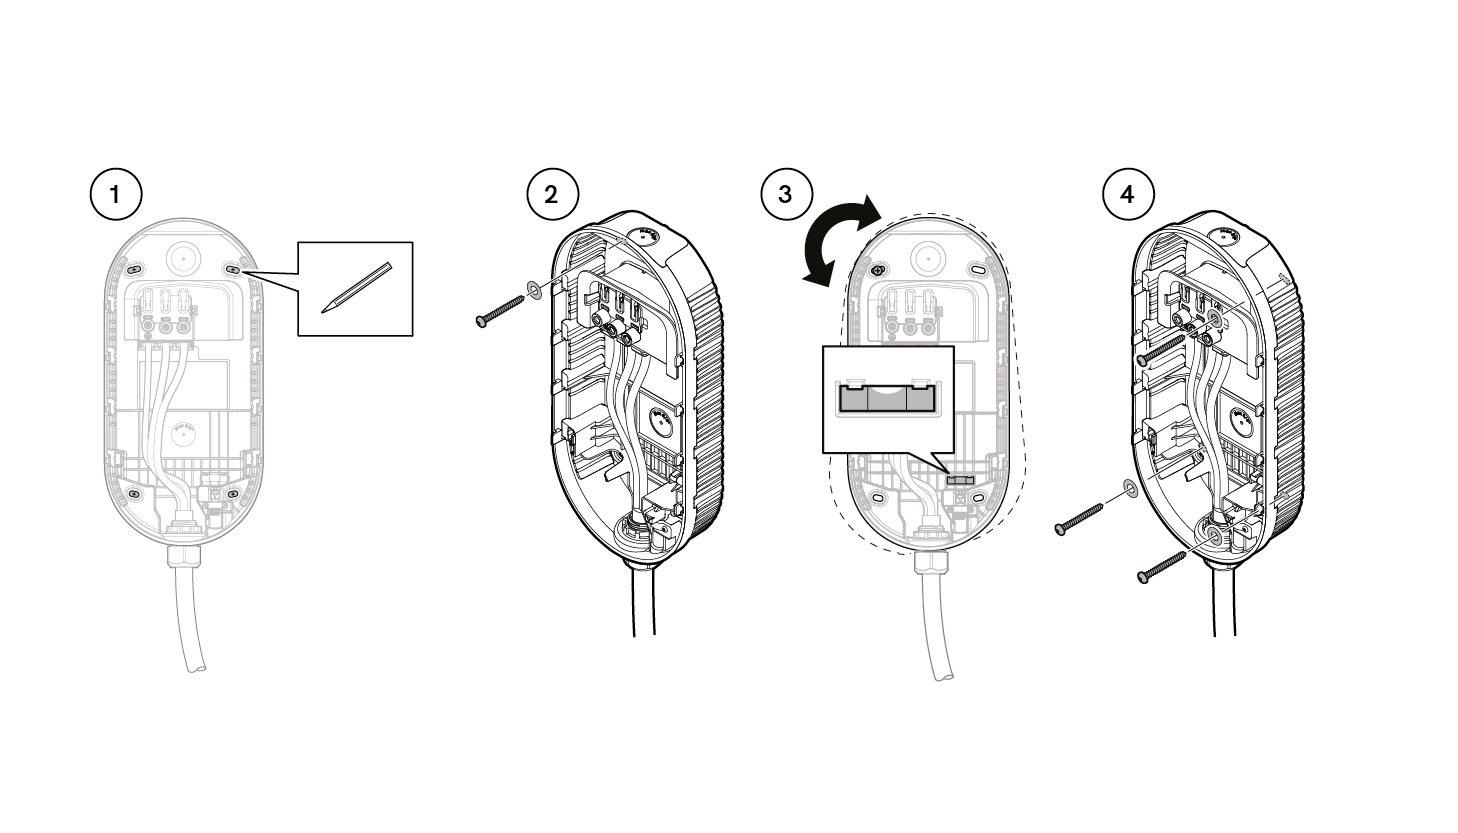
- Mark the four fixing points on the wall, using the Wall Bracket as a template.
- Attach the Wall Bracket with one screw using one of the points marked above.
- Use the built-in level to align the charger. If needed, use wall plugs.
- Insert and tighten the screws in the remaining screw holes to secure the bracket to the wall.
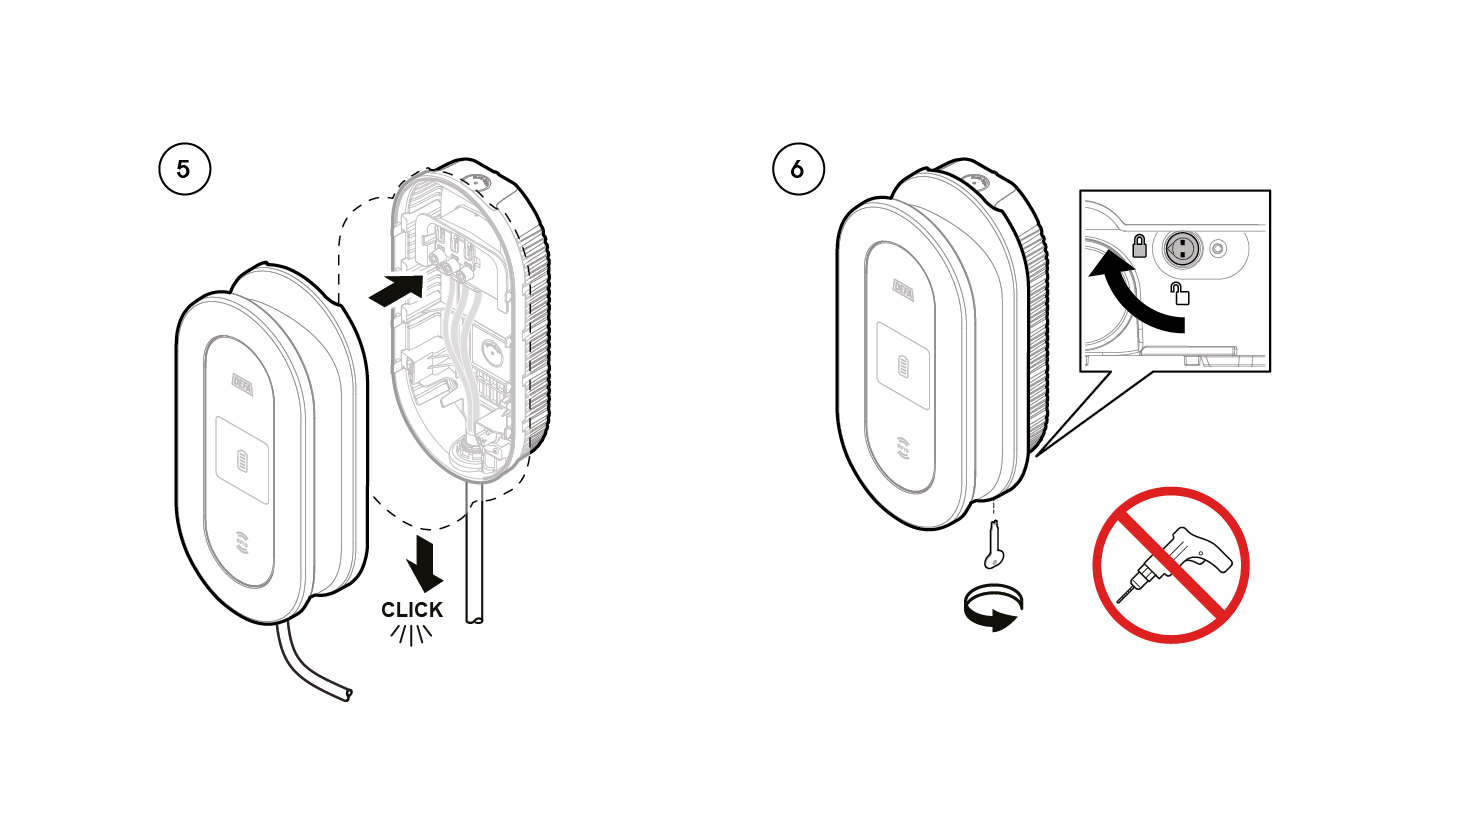
Connect the Charging Unit by pushing the male terminal pins into the female terminals on the Wall Bracket.
- Slide the Charging Unit down until you hear a “click”.
- Using the included locking tool, turn the lever from the unlocked position to the locked position.
4
Connect power
Once the installation has been completed, reconnect the power supply.
The installation is now completed and the charger is ready for configuration. (link til app artikkel)


